What Is Claude Code CLI? (Before You Install)
Claude Code CLI by Anthropic is a terminal-based AI coding assistant that works directly inside your development environment. Instead of switching between browser tabs, you can run commands, edit files, debug code, and manage projects using natural language inside your terminal.
It is widely used in 2026 because it:
- Reads your full codebase
- Edits multiple files at once
- Executes terminal commands
- Integrates with Git workflows
- Works across macOS, Windows, and Linux
If you are planning a Claude code CLI installation, this guide walks you through every method in a simple way.
Prerequisites Before Installing Claude Code CLI

Before starting your Claude code CLI setup, make sure you have:
Claude Subscription
You need access to Claude via:
- Pro plan
- Max plan
- Teams or Enterprise
Alternatively, you can use an API key from the Anthropic console.
Terminal Access
You need a working terminal:
- macOS Terminal
- Linux Shell
- Windows PowerShell or Command Prompt
- Or Windows Subsystem for Linux (WSL)
Node.js (Only for npm Method)
If you plan to install using npm:
- Install Node.js
- Make sure npm is working
Method 1: Native Installer (Recommended)
This is the easiest and most reliable way for Claude’s code CLI installation.
macOS and Linux Installation
- Open your terminal
- Run the official install script using curl
- The script automatically installs Claude Code and sets up your system
This method is preferred because:
- It includes auto-updates
- It configures your environment automatically
- It avoids dependency issues
Windows Installation (PowerShell)
- Open PowerShell
- Run the official installer command
- Follow the on-screen prompts
Windows Command Prompt Alternative
- You can also install using the Command Prompt
- The process is similar, but may require manual steps for PATH setup
Why Native Installer Is Best
Compared to npm or other methods:
- Faster setup
- Fewer errors
- Built-in updates
- Better compatibility
For most users, this is the best way to install Claude Code CLI.
Method 2: Install via Homebrew (macOS)
If you use Homebrew:
- Install Claude Code using the Homebrew cask
- Wait for the installation to complete
- Verify installation in the terminal
This method is clean and integrates well with macOS systems.
Method 3: Install via npm (Cross-Platform)
This method is useful for developers.
Steps:
- Install Node.js
- Use npm to install the Claude Code package globally
- Verify installation
Use this if:
- You prefer package managers
- You manage multiple dev tools via npm
Method 4: Windows WSL Installation (Best Experience)
For Windows users, WSL gives the smoothest experience.
Step 1: Install WSL
- Enable Windows Subsystem for Linux
- Install Ubuntu
Step 2: Update Packages
- Open the Ubuntu terminal
- Update system packages
Step 3: Install Claude Code
- Run the native installer inside WSL
Step 4: Configure PATH
- Ensure Claude’s command is accessible globally
WSL is recommended because:
- Better compatibility
- Fewer permission issues
- Closer to a Linux/macOS environment
Method 5: Install via winget (Windows)
You can also use Windows Package Manager:
- Open PowerShell
- Install Claude Code using winget
- Verify installation
This is simple but may not always have the latest version.
Post-Installation Setup
After completing your Claude code CLI installation, follow these steps:
Verify Installation
- Run the version check command
- Confirm that Claude CLI is installed correctly
First Launch and Authentication
When you run Claude for the first time:
- A browser window opens
- You log in to your account
- Authentication completes automatically
Choose Authentication Method
You can use:
- Subscription login (Pro, Max, Teams)
- API key from Anthropic
Initialize Your Project
Run the init command to:
- Create a CLAUDE.md file
- Store project context
- Enable better AI responses
Connecting Claude Code CLI to VS Code or Cursor
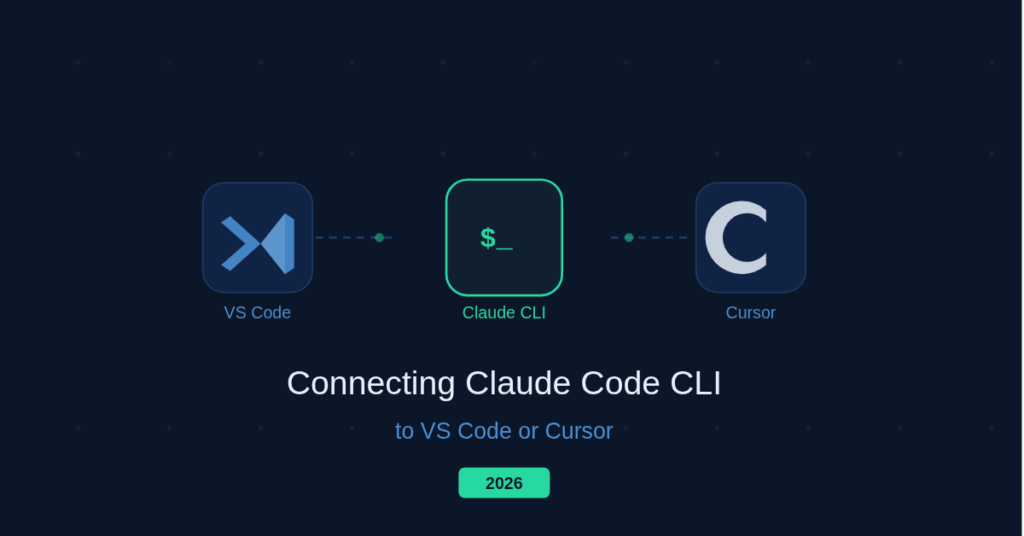
Claude works well with:
- VS Code
- Cursor IDE
Benefits:
- Edit files directly
- Use AI inside your coding workflow
- Faster development cycles
How to Update Claude Code CLI
If you used the native installer:
- Updates happen automatically
If using npm:
- Update manually using npm
Keeping your CLI updated ensures:
- Better performance
- New features
- Bug fixes
Troubleshooting Common Installation Issues
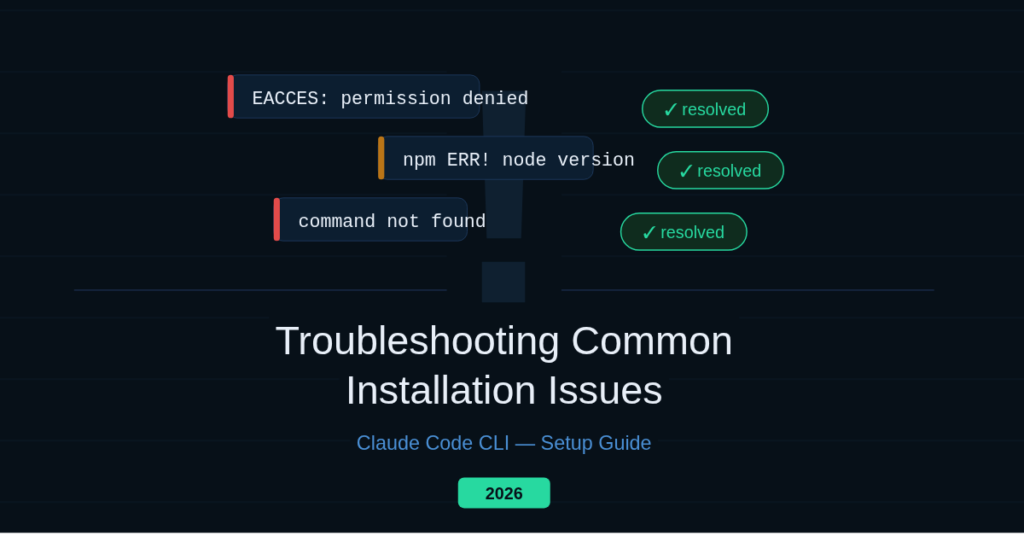
“Claude Not Found” Error
- Your PATH is not set correctly
- Restart the terminal or update the PATH manually
Permission Denied Errors
- Run the terminal with proper permissions
- Fix file access settings
WSL Issues
- Reconfigure PATH
- Restart the WSL environment
Authentication Problems
- Log out and log back in
- Clear the session and retry
Final Thoughts
Setting up claude code CLI installation is straightforward if you follow the right method. For most users, the native installer is the best choice due to simplicity and reliability.
Once installed, Claude Code CLI becomes a powerful development tool that:
- Saves time
- Automates coding tasks
- Improves workflow efficiency
FAQs
- How to install Claude Code CLI quickly?
Use the native installer with a curl command for the fastest setup. - Can I install Claude Code CLI on Windows?
Yes, using PowerShell, WSL, or winget for full compatibility. - Do I need Node.js for Claude Code CLI installation?
Only if you choose the npm install method. - How do I fix “Claude command not found”?
Update your PATH environment variable and restart the terminal. - Is Claude Code CLI free to use?
It requires a Claude subscription or API access from Anthropic.
Ready to turn ideas into real growth? Partner with AmazeTech and let data-driven strategy, AI-powered execution, and proven marketing systems work for your business. Reach out today and start scaling smarter.